Thursday, October 3, 2013

Conquer the Fear...of sewing.

Fear is a peculiar thing.  I suppose there are times when it works in our benefit, but most often it seems to keep us from reaching our full potential.  It may keep us from going somewhere we've never been, reaching out to someone we don't know very well, or maybe trying something new...like painting with a fun color....or...sewing a pillow.  When you say it out loud, being afraid of sewing a throw pillow seems a little silly, but it has the same root as everything else.  A fear of failure.

For me, the perfectionist, my biggest hang-up with trying something new is getting started.  What if I don't like it and have to (gasp) try something different?  What if someone else doesn't like it or even criticizes me for it?  What if it takes more than one try to get it right?  Trust me, I've been in all of those situations *many* times and here is the conclusion I've come to....  who cares???  If this is something you struggle with too, I promise everything will be alright.  These are, after all, first-world problems.  :)  Let's face it, decorating is small potatoes in the big scheme, but I truly believe accomplishing these little projects, one by one has some great life skill practice woven in there somewhere.  With every small success, a little more confidence to try something new takes hold.

Sewing seems to be one of those activities that creates fear in people.  I've been told many times by friends that they would either like to learn to sew or can't sew.  Don't get me wrong, there are some sewing projects that do require a great deal of skill...I don't recommend starting with those, haha.  But two common home decor sewing projects, throw pillows and curtain panels, are well within the skill set of a beginner.

Here's an example of patterned throw pillows and simple unlined drapery panels made by me.  A huge benefit to tackling custom pillow covers is the freedom to get exactly what you want, including better quality, for less than you would pay at the store!

Living Room

So, if it's fear holding you back...let's conquer that fear together and make a pillow cover!!


Here is your supply list:

-sewing machine: nothing fancy required...I've had my very basic machine for almost 17 years and it hasn't let me down yet!!


-standard foot and zipper foot


-cutting mat, ruler, and rotary cutter


-pillow form: I only use down pillow forms.  I stopped using poly-forms a long time ago.  They go flat so quickly and look lifeless.  It's worth the couple extra dollars to invest in a down form.  Most times they can be found at local specialty fabric stores or upholstery shops, but Ikea is a great source for cheap pillow forms!  All the measurement instructions I give will be based on the assumption that a down pillow form is being used.

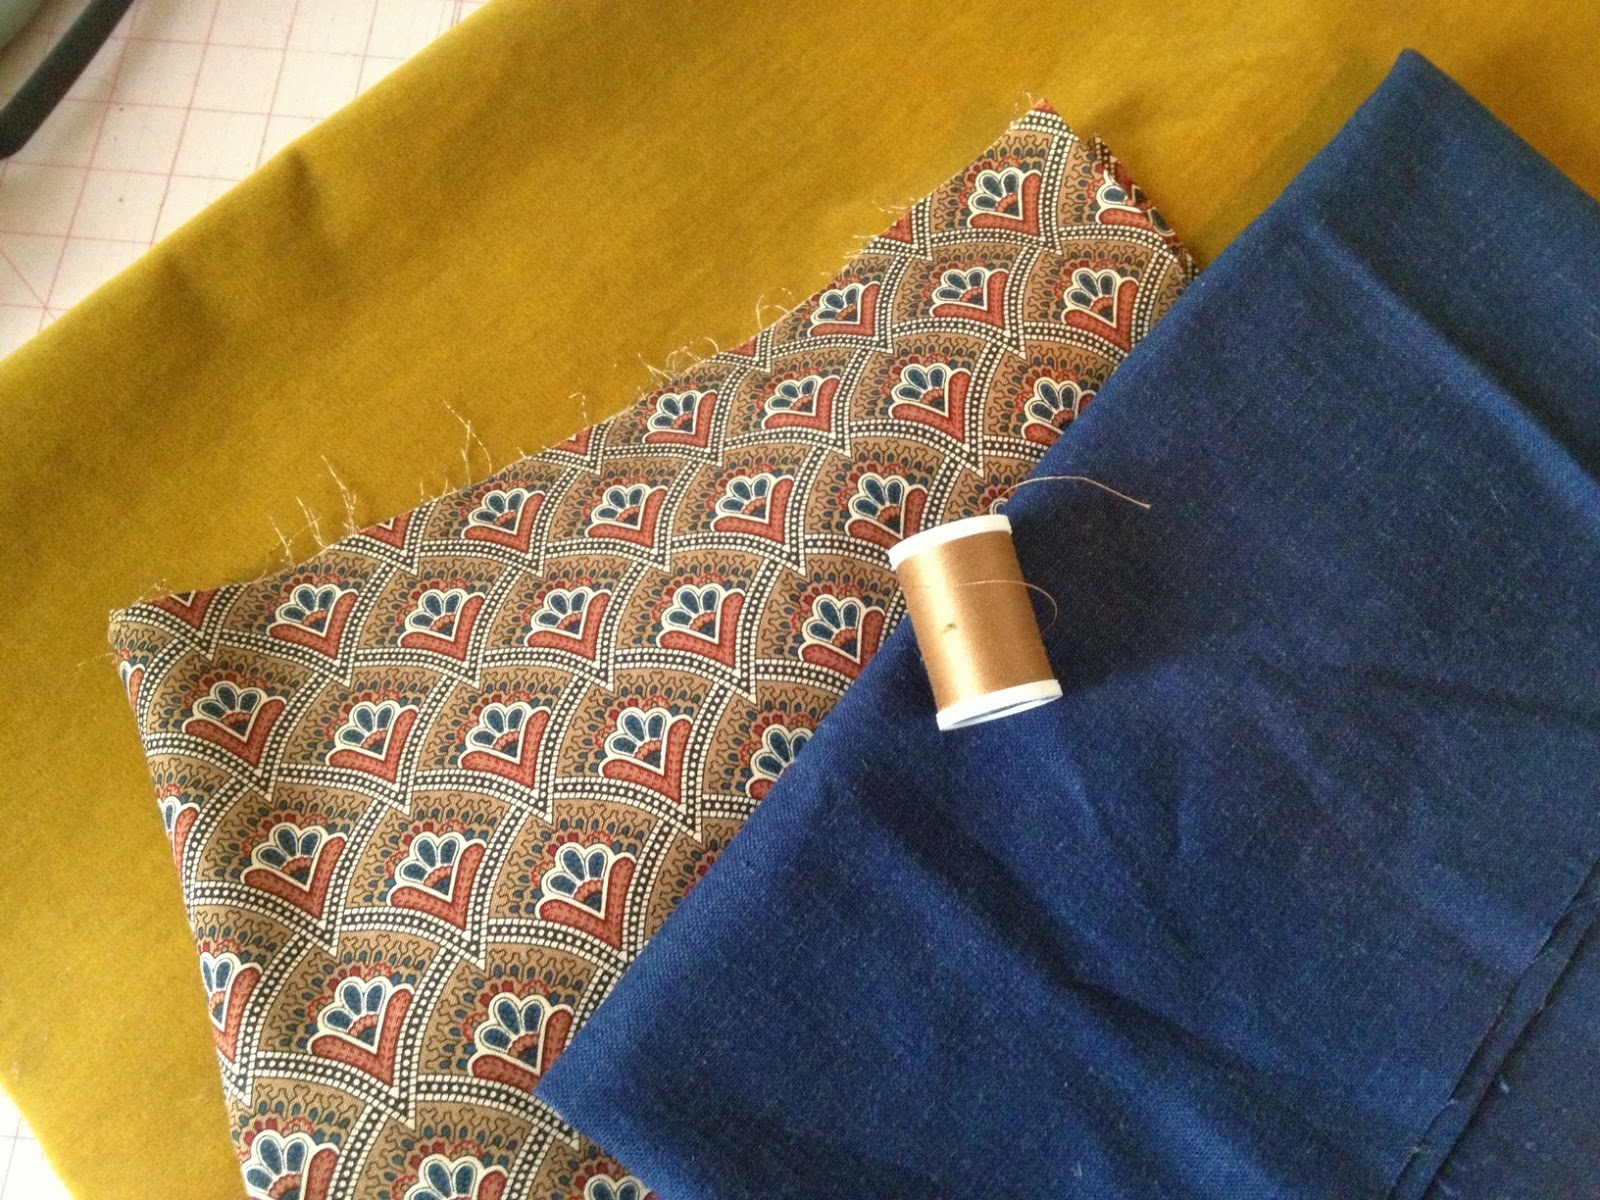
-fabric: One yard of 54" fabric is usually plenty (and sometimes even too much) to cover a pillow using the same fabric on both sides.  If you plan to use a contrasting fabric on the reverse side of the pillow, you'll need to account for that.  You'll also need extra fabric if you plan to add cording or a ruffle.

-cotton cording (optional): this can be found in the home decor section of the fabric store.  It is sold by the yard or in a package of a few yards.  I will be using this in the pillow I tackle.  Don't let it scare you!! It's really simple!


-thread

-zipper (optional): 4-6" smaller than the width of your pillow form should be just fine.

-regular scissors

-dressmaker's measuring tape


-pins...these are my favorite


-seam ripper (hey, mistakes happen ;) )


-iron and ironing board:  There are probably alternatives out there to the ironing board if it's not something you use on a regular basis, but they really are handy for sewing.

Since this post has become a beast...meet me back here tomorrow and we'll get started!  Can't wait!  Remember...you can do it!!

Update @ 10pm: tutorial rescheduled for Monday.  The good ol' iPhone taking the pictures for me powered down mid-process and I took that as a sign it was exhausted too!! And, good things don't usually happen when you try to force them...so I'm headed to bed!  Forgive me? :)  It's going to be great though! See you Monday!

xo,


Wednesday, October 2, 2013

The Blue Door

I really lucked out with a husband who is super handy.  Between the two of us, we can and have done most of the projects around here.  It has saved us a ton of money and as an added bonus, taught us how to work really well as a team.  Learning to work well together definitely had its learning curve and we've had our fair share of arguments over the silliest of things, but I'm thankful...because I really believe that it strengthened us a couple and gave us the skills to face some of the other challenges that presented themselves over the last many years.  And, usually, when we do a project together now we actually have fun!! and can joke about the things that don't always work out the way we want them to the first time!

That being said...I plan projects around the two major times that my husband is completely out of commission...planting and harvest.  There are other times, of course, that farming takes precedence but those are the two big ones.  It actually usually works out perfectly, because there are a ton of little, but time consuming, things that make it onto the "list" but get neglected when the larger construction-type projects are going on.  Painting happens to be a biggy.  I love paint.  It's cheap and provides a big impact.  It's not a difficult project and it's low on the commitment scale...but seriously, it takes forever...and is about the most boring job!!

My front door really needs a new coat of paint.  Actually, the whole front porch needs a lot of love.  We'd hoped to get to that this summer, but we spent more time than we planned in the backyard instead.  I'd love to get at least the door painted before it gets cold...and the rest will just have to wait!

I'm thinking a blue??  But I don't really have the perfect shade in mind yet.  So, the girls and I trucked ourselves to Home Depot today and picked up a few samples.


I've got to say, it's become really fun to take the girls with me on these trips! I love how Olivia comments with her opinions on things! It's so fun to see her taste develop and I couldn't be more thrilled that she seems interested in the things that I love too!  She has her limits though...  She was 'Home Depot'ed out by the time we left...Isabelle clearly was still "cheese"ing it up!


Anyway, when we got home I painted up some samples.  Normally, I would use poster board, but it I used these paper plates in a pinch!


Time to test them out on the door!


Ummmm...fail.  After seeing these I know for sure that I do not want a blue door.  Green's out also, too many green plants to compete with the majority of the year...  How about red??  Do I dare??  I guess the girls and I will make our way back to Home Depot...they love us there, haha :)  And I think that one of those blues will come in quite handy for another project brewing the downstairs bath!

xo,


Tuesday, October 1, 2013

A place to rest.

Harvest is upon us friends.


When I began thinking about what to write about today, I admittedly didn't have a clear direction on where to begin.  There are many things that go on behind the scenes of creating a home...some which apply to our personal situation and some which are pretty universal!! Like most mornings, I took a few minutes to read my devotion for the day and today's topic was rest.

The irony of discussing *rest* during harvest season is not lost on me.  It is during this time that our family is deeply reminded of how valuable rest is to each and every one of us.  And, isn't it also one of the main functions of a home?? To rest.  Decorating may seem like we are lost in the bustle of picking out paint colors and throw pillows, but behind the scenes we are really creating an atmosphere.

A place that's comfortable.  A place that shuts out the world.  And also, a place where we can rest.

One of my favorite rooms in our home which does just that is our bedroom.  For us, it's a perfect place to crash at the end of the day.

xo,


Monday, September 30, 2013

31 Days - Behind the Scenes

So as it turns out I haven't quite figured out how to work blogging into the everyday.  It seems like each day runs out before "writing a blog post" makes it near the top of my "to-do" list.  This month one of my favorite bloggers The Nester is hosting a 31 day series.  Bloggers are invited to "link up" and talk about any topic they wish to for the 31 days of October.  It's been on my mind...albeit kind of in the back...that I would love to participate this year!  However, October tends to be just a *little* crazy around here.  It got me thinking the craziness of October and a 31 day writing challenge could be a good pair.

For the next 31 days I'm going to be blogging about the "behind the scenes" of our farmhouse.  If you really stop and think about it...it is often what goes on behind the scenes which gives a project its heartbeat and purpose.  This proves to be very true in the larger picture of our old house renovation.  The things that go on which not everyone may see complete the pieces of the puzzle and give purpose to the very reason we desire to create our "home".  I'll be sharing some bits about our family and farm life as well as some current little projects and inspirations...a journal of our personal goings-on for the month.  It may be a slight departure from the traditional topics, but my personal challenge is to blog everyday for 31 days!

Hope you enjoy!


Day 1: A place to rest.
Day 2: The Blue Door
Day 3: Conquer the fear...of sewing
Day 4: The Little Farm Boy
Day 5: New Baby Celebration
Day 6: Oh, Homegoods
Day 7: DIY Cording for Throw Pillows
Day 8
Day 9: Mess and Perseverance
Day 10: DIY Throw Pillow Tutorial
Day 11: Girls Trip!
Day 12 - Day 23:  Mid-month hiatus?? Oops.

Day 24: Can we salvage this?
Day 25: Snow
Day 26: Black Doors

And don't forget to check out the other posters here!

xo,


Tuesday, July 9, 2013

Dining Chairs with Potential

Dining chairs take quite a bit of abuse in our house.  Years ago, before kids, I purchased a set of queen anne style antique english chairs which I love.  I personally believe in using antiques and not just having them around to collect dust....but...given the current season of our lives, if we continue to use these chairs for everyday....they will be destroyed.  So, I decided to scatter them about our house where they would be used in much lighter way and search for an affordable, sturdy option that would hold up to our brood.

For our purposes we don't need museum quality furniture here.  These new chairs have 3 requirements.  1) Handle abuse for 'x' amount of years of having small children
2) Look good
3) Not cost a fortune

Not asking for too much right?? ;)

The first requirement is the biggest.  Kids are hard on furniture...there is just no way around it.  I know these chairs are going to get dirty.  I know they are going to get scratched and probably covered in spaghetti sauce or some other staining compound more than once.  :)  And while it is my goal to teach my children to respect and take care of the things they have, I do not want to be stressed 3 meals a day, haha.  

My other challenge stems from having our only dining area located in the kitchen.   For this reason, I would like these chairs to look fairly nice for occasions, no matter how few and far between, when this room takes on a more formal role.  In my opinion, you can't beat a good upholstered chair and for this room I think an upholstered chair would add a lot of warmth to a room filled with primarily wood tones.  But kids and upholstery in the kitchen?? Yikes!  Without a doubt not as wipeable as a wood chair, and definitely not a great option for everyone...but I have a few solutions that will help make upholstered chairs manageable for us.

The best chair I found for the job was this one...


I came across this one on overstock.  I liked the white, hated the upholstery (easy fix), and the reviews were good enough that I took a chance.  The pricepoint, while certainly not free, was good enough that I won't loose sleep over it when/if my kids destroy these chairs and they need to be replaced down the road.  Maybe they will be able to eat spaghetti without leaving evidence by then?? haha  

The key to these chairs is in their reupholstery potential.  This is a fairly easy reupholstry job.  Very similar in difficulty to the chairs I reupholstered for my living room.  Instead of a patterned fabric, however, my plan is to go with a linen from Grey Line Linen.  I can't remember where I first heard of this company, probably Jenny from the Little Green Notebook, but they are a fantastic source for linen. Their color range is huge and the price point is excellent!  

Here is what I went with for the body of the new upholstery...  


I'm not sure how accurate the pic of this color is, but think of a natural burlap/jute color.

I found a few yards of this fabric stripe in my "fabric collection", haha, which will be used for the back of the chair.  


A little sidenote about this stripe fabric...  I'm actually using the "wrong" side of this fabric.  The correct side of this stripe was just a little too strong...


So, I flipped it and it softened it just the right amount!

Instead of a double-welt like was previously used, I will be using this navy twill tape and antique brass nail heads.  Here's a little mock-up of how everything will look together!


Now the fun begins...the removal of the old to add the new!

xo,

Monday, July 8, 2013

Backyard Progress

We're moving along in the backyard!!  If you need a refresher, before pics can be found here.

The new deck is finished (sans paint/stain).... I think some planters would look nice on each of the corners on this deck...but that's pretty low on the to-do list as of now.


New plants have been planted between the decks.  There are just a couple more to add to the section next to the house, one being a climbing something between the two windows??  To be determined...

We also added some gravel in our new path between the decks to reduce the "mud" factor from all the rain we've been getting.  Eventually, it will be the base of whatever walkway we finally decide on.


Here's a view from the new deck to the existing deck with new railing!  


And... a view from the existing deck to the new deck...


View of the existing deck just as we began removing the old step down area.


See the caved in boards?? Yep, I forgot they had already been cut for removal when I ran up the old stairs to get my phone located on the railing.  Oops.  Somehow, I landed on my back next to the deck in a hole from where I had just relocated some flowers?  Not sure I managed that...and yes, I'm fine.  Just a few scrapes.  :)


Progress made!! Old deck part removed! Ready for some landscaping!  Some of the old posts still need to come out, but the yard needs to dry out a little before we can get the equipment back here again.


Next steps....
-a bit more construction to railing and posts toppers
-move some existing plants and fill in with a couple new ones
-add skirting to deck
-finish railing for deck stairs
-old paver removal
-grass planting
-replace screen door
-paint floors
-and...work on pathway between decks

Still looks like a big list, but we can see light at the end of the tunnel!!

xo,


Monday, July 1, 2013

Outdoor Project Week

This summer we decided to tackle some exterior projects.   A few years ago, we added a fence to a section of the yard as a safety measure to protect our kids from a pond that is near our house.  Our swingset, sandbox, etc. reside in this area.  We have spent a ton of time back there over the last few years but have not given its aesthetics much of our focus. 

The house already had a deck and pergola as well as a paver walkway to another deck/pier that was located in the area which we fenced in.  I'm not sure exactly when the existing deck and pergola were added to the backyard, but it was a least 20 years ago.  There is a glimpse of it in one the aerial shots here.  Given it's age, it's probably not a surprise that it needs some repair.  Also, most of the plants that were originally planted in this area have either kicked the bucket or gotten way out of control.  And lastly, the paver walkway has settled so much that the pavers are very uneven and the weeds have taken over.  It's gotten a little worse each year, and we have know for awhile that eventually we were going to have to deal with it.  

Last week we had a little "stay-cation" and we worked outside in our backyard.  Our major goals were to remove a large overgrown bush, figure out what to do in the space sans bush, and repair/modify our deck.  All things combined, we decided this was a good opportunity to really think about our backyard space as a whole and consider what could work a little better for us or what needed changed.  We also recently purchased a trampoline (giant eyesore but tons of fun :) ) for the kiddos and as things currently exist there wasn't a place inside the gated area to house this, so there was also that to think about.


We tackled the removal of the bush first. 

Picture of bush....excuse missing shutter...it's on the list with many other things :)

Over the last few years, this bush has totally taken off and had become my adversary.  It was impossible to keep pruned back and it was covered in prickly thorns.  For a couple years we had some kind of tree pop up behind it and grow into it....that was fun to remove....ouch! :)  And...it was starting to get way too close to the pine tree beside it.  Before long I'm pretty sure it would have overtaken the kitchen window too!  Mark and I were both a little apprehensive to remove it because we weren't sure how we would feel about the big and empty section of house that would be revealed, but we really couldn't come up with a better option.  The bush had to go.  It's really hard to tell from the pictures just how big this bush was, but it took 3 full truck loads to haul all the branches away.  We were both amazed at how much of an improvement simply removing the bush was!  A clean slate to work with!

Bye, bye bush...


Back to the deck....

Existing deck and original pavers

Another view
A few years ago, we painted the deck white to match the house. We love how it feels more like an extension of the house by being the same color, almost like a big porch.  We have replaced a few boards here and there as needed, but the railings were starting to rot and we knew that they were going to need some attention soon.  This deck has served us well, but since major repairs are on the horizon this year, it made sense to now change the things that could really function better for us.  

No. 1:  You may be able to see there are built-in seating areas.  While great for extra seating, they obstruct the view to the swingset where the kids play.  Since we are out there all. the. time...it would be really nice if we could sit on our comfy patio furniture and relax as we watch the kids.

No. 2:  There is about a 5' section of the deck that steps down just after the pergola ends.  We have found this is completely useless space to us.  There just isn't much in the way of furniture that either fits or makes sense to put there.

No. 3:  It's just a little tight to have both an eating area and a seating area on this one deck without it feeling congested and obstructing the flow of traffic.

We tossed around *a lot* of possible ideas.  This was kind of a giant puzzle, but once we figured out all the pieces, we became really pleased with how everything will work together when we are finished!

Our Solution:

(Side note... I would love to show some progress pictures...but it decided to rain today and I don't have any taken.  As the wife of a farmer in an area of the country that has experienced drought for the past two summers...I am absolutely not allowed to complain about this.  Haha.  Even though it's slowing down my project.  And messing with my schedule for the week.  ;)  So please bear with me and try to visualize... )

In place of the bush, we built another deck.  It's only one step off the ground, so it doesn't require an enclosed railing and still feels open to the yard.  We plan to use this as our outdoor "dining area".  It's the perfect size for our table and chairs with an umbrella for shade.

The decision to add this second deck, as well as figure out a way to include the trampoline in the fenced in area, greatly influenced the changes we are making to the existing deck.

We decided that the best place for the trampoline is directly out from the deck.  Kind of to the left of where I was standing to take the picture of the deck and pavers above.  The only problem is that if placed here, the trampoline will interfere with the existing paver walkway.

We resolved this by changing where the stairway accessing the deck is located and also relocating the paver walkway.  By doing this, we can create a new walkway between the new deck and the existing deck and create a larger yard area where the old pavers were located so we can include the trampoline.  We will no longer have a walkway to the pier/deck area, but we have decided for no more than we access that area (currently never) it should not be a problem to walk through grass.  

We are also removing the 5' step down extension of the deck as well as all the built-in benches and replacing the rail all around.  By removing the deck extension this also allows us a few more feet of additional yard space.

Needless to say, we did not complete this project last week.  I'm pretty sure we checked off the bulk of the difficult steps , but we still have a ways to go!   Most of the construction that needs to be finished is pretty straight forward and then I can move on to the landscaping and a few other finishing details!  (Yay! My favorite part! ;) )  Unfortunately our updates won't reach there full potential until the end of the summer, at the very earliest, when we can paint it...(pressure treated wood takes forever to dry before it can be painted/stained...ugh!)....but I'm so excited about the changes we've made that it's totally worth the wait!

I'll try to get a few pics soon with the updates completed so far!

xo,